How to Create Your Own Rubber Stamp in 3 Easy Steps!
Print
How to Create Your Own Rubber Stamp in 3 Easy Steps!
Creating your own custom rubber stamp can be a fun and rewarding project, whether you're a small business owner, a crafter, or just someone who loves DIY projects. Learning how to make your own stamp allows you to add a personal touch to your work and make a lasting impression on whatever you're stamping, be it packaging, cards, or documents.
As someone who has spent years helping people create their own stamps for all sorts of purposes, I’m here to walk you through the process. Don’t worry—it’s much easier than you think! In just three simple steps, you’ll be ready to create your own stamp and start using it right away.
Let’s dive in!
Step 1: Choose Your Design
This is the most exciting part of the process—deciding what your stamp will look like! Your design is the foundation of your custom rubber stamp, so it’s important to take a little time to think about what you want your stamp to convey.
What Should You Stamp?
- For Business Owners: If you're running a business, consider using your logo to create your own logo stamp. This gives your brand a professional and cohesive look across everything from invoices to packaging. I’ve worked with several small business owners who use custom logo stamps to elevate their brand, and the results are always impressive.
- For Personal Projects: If you’re looking to make your own stamp for personal use, the possibilities are endless! You can stamp your name, a favorite phrase, or a custom illustration. Personally, I’ve designed stamps for everything from personalized gift tags to save the dates for my wedding!
Tips for a Great Design:
- Keep it Simple: Less is often more when it comes to stamps. Simple, bold designs typically translate better onto the rubber surface, especially if you’re working with a smaller stamp size.
- Think About Size: The size of your stamp will dictate how detailed your design can be. If you’re opting for a smaller stamp (let’s say 1” x 1”), stick to clean, minimal designs. For larger stamps, you can incorporate more detail without losing clarity.
- Text or No Text?: If you’re adding text, make sure to use a bold font that’s easy to read. Fine, delicate fonts can sometimes get lost when transferred to a stamp.
My Personal Experience:
I remember the first time I decided to create my own stamp—it was a simple monogram for a friend’s wedding invitations. The design was minimal, but the impact it had on their invites was huge! The bride and groom were thrilled, and they even used the stamp later on their thank-you cards.
Step 2: Pick the Right Stamp Type
Now that you have your design, it’s time to choose the type of stamp that will best suit your needs. Not all stamps are created equal, so it’s important to think about how you’ll be using yours when you make your own stamp.
Types of Custom Rubber Stamps:
Self-Inking Stamps
A custom self-inking stamp comes with a built-in ink pad that automatically re-inks the stamp after each use. These are great for business owners who need to stamp lots of documents quickly. They provide a consistent, clean impression every time and are ideal for high-volume use.
- Best For: Business use, repetitive tasks like stamping envelopes or invoices.
- Example: I helped a real estate office design a custom logo stamp with their address, and they used it to quickly mark envelopes and contracts. They saved so much time by using the self-inking stamp instead of manually writing their return address!
Traditional Rubber Stamps
The classic traditional rubber stamp requires a separate ink pad and gives you a bit more flexibility when it comes to ink color. These stamps are great for artsy, DIY projects or when you want to create a handcrafted feel. Plus, you can change ink colors whenever you like.
- Best For: Crafts, personal projects, and anyone who enjoys the tactile experience of stamping.
- Example: I’ve used traditional rubber stamps for everything from homemade greeting cards to customized gift wrap. There’s something nostalgic and satisfying about pressing the stamp into the ink pad and getting that perfect impression!
Pre-Inked Stamps
A pre-inked stamp is a bit like a self-inking stamp, but instead of using a separate ink pad, the ink is embedded directly into the stamp itself. This type of stamp produces the sharpest and cleanest impressions, making it ideal for intricate logos or detailed designs.
- Best For: Intricate designs, logos, or artwork that requires fine detail.
- Example: I once worked with an artist who wanted to stamp her signature logo on her prints. We used a pre-inked stamp, and the sharpness of the design was spot-on—no smudging or loss of detail, even with tiny lettering.
Step 3: Submit and Order Your Custom Rubber Stamp
You’ve got your design and chosen your stamp type—now it’s time to make it official! Submitting your design for production is the final step, and it’s crucial to get everything right before placing your order.
What to Check Before Submitting Your Order:
- Double-Check Your Design: Ensure that your logo, artwork, or text is clear and exactly as you want it to appear on the stamp. If you're using text, make sure everything is spelled correctly. I can’t tell you how many times I’ve caught last-minute spelling errors before submitting an order!
- Choose the Right Size: Remember to match the stamp size to its intended use. For example, if you’re using it on packaging, you might want a larger stamp to make your logo stand out.
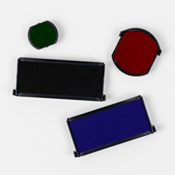
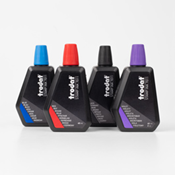
- Select Your Ink Color: If you’re using a self-inking or pre-inked stamp, consider which ink color will complement your brand or project. Black is the most common, but vibrant colors like red or blue can also make your stamp pop.
Conclusion: Start Stamping with Your Custom Rubber Stamp!
Learning to make your own rubber stamp is a simple yet rewarding process that lets you add a personal or professional touch to almost anything. Whether you're using it to brand your business, add flair to your packaging, or bring a personal touch to gifts and projects, your custom stamp is a versatile tool that you’ll find yourself using again and again.
With these three easy steps—choosing your design, picking the right stamp type, and submitting your order—you’ll be well on your way to having a beautiful custom rubber stamp in your hands. The next time you’re looking to create your own stamp, you’ll know exactly what to do!
Ready to make your own stamp? Follow these steps, and you’ll be stamping in no time! Get started here.


