
Blog
RSS Feed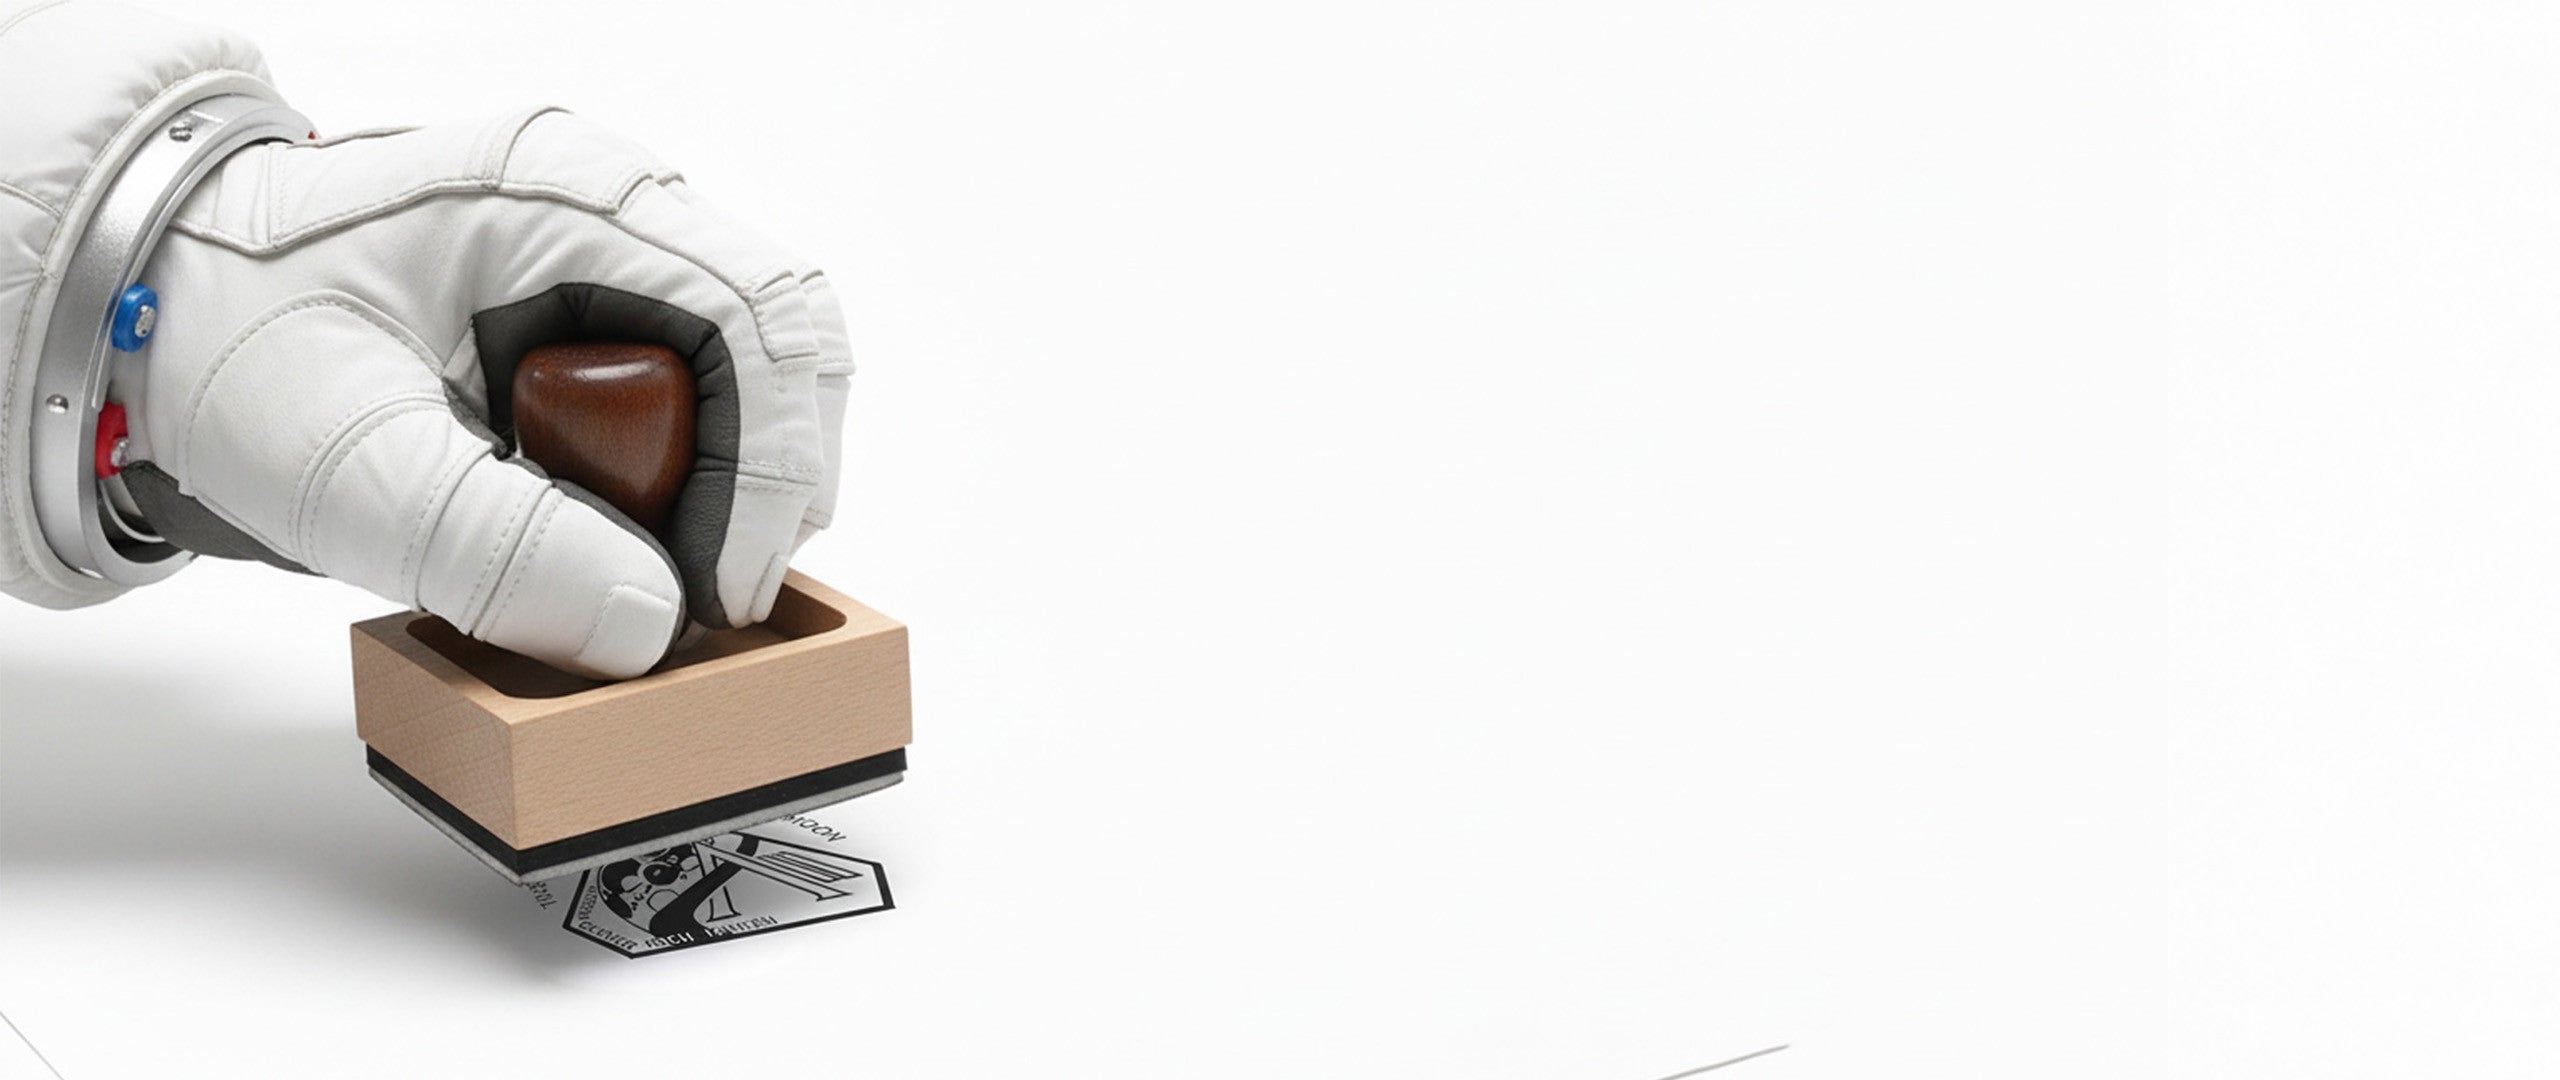
One Mission. One Stamp. One Mark Beyond Earth.
It started the way many great stories do.
With a phone call.
NASA called our customer service team with a simple question that carried extraordinary weight: Can you make a stamp for an upcoming mission?
Not just any stamp.
A truly custom one.
This stamp had to meet precise requirements. A specific weight. A detachable handle. A compact footprint. And it still had to deliver what Simply Stamps is known for every day: crisp impressions, dependable engraving, and consistency you can trust.
This stamp wasn’t going to an office, a classroom, or a warehouse.
It was going around the moon as part of the Artemis II mission.
And our answer was simple.
Yes.
When Custom Actually Means Custom

At Simply Stamps, custom is not a template. It is a responsibility.
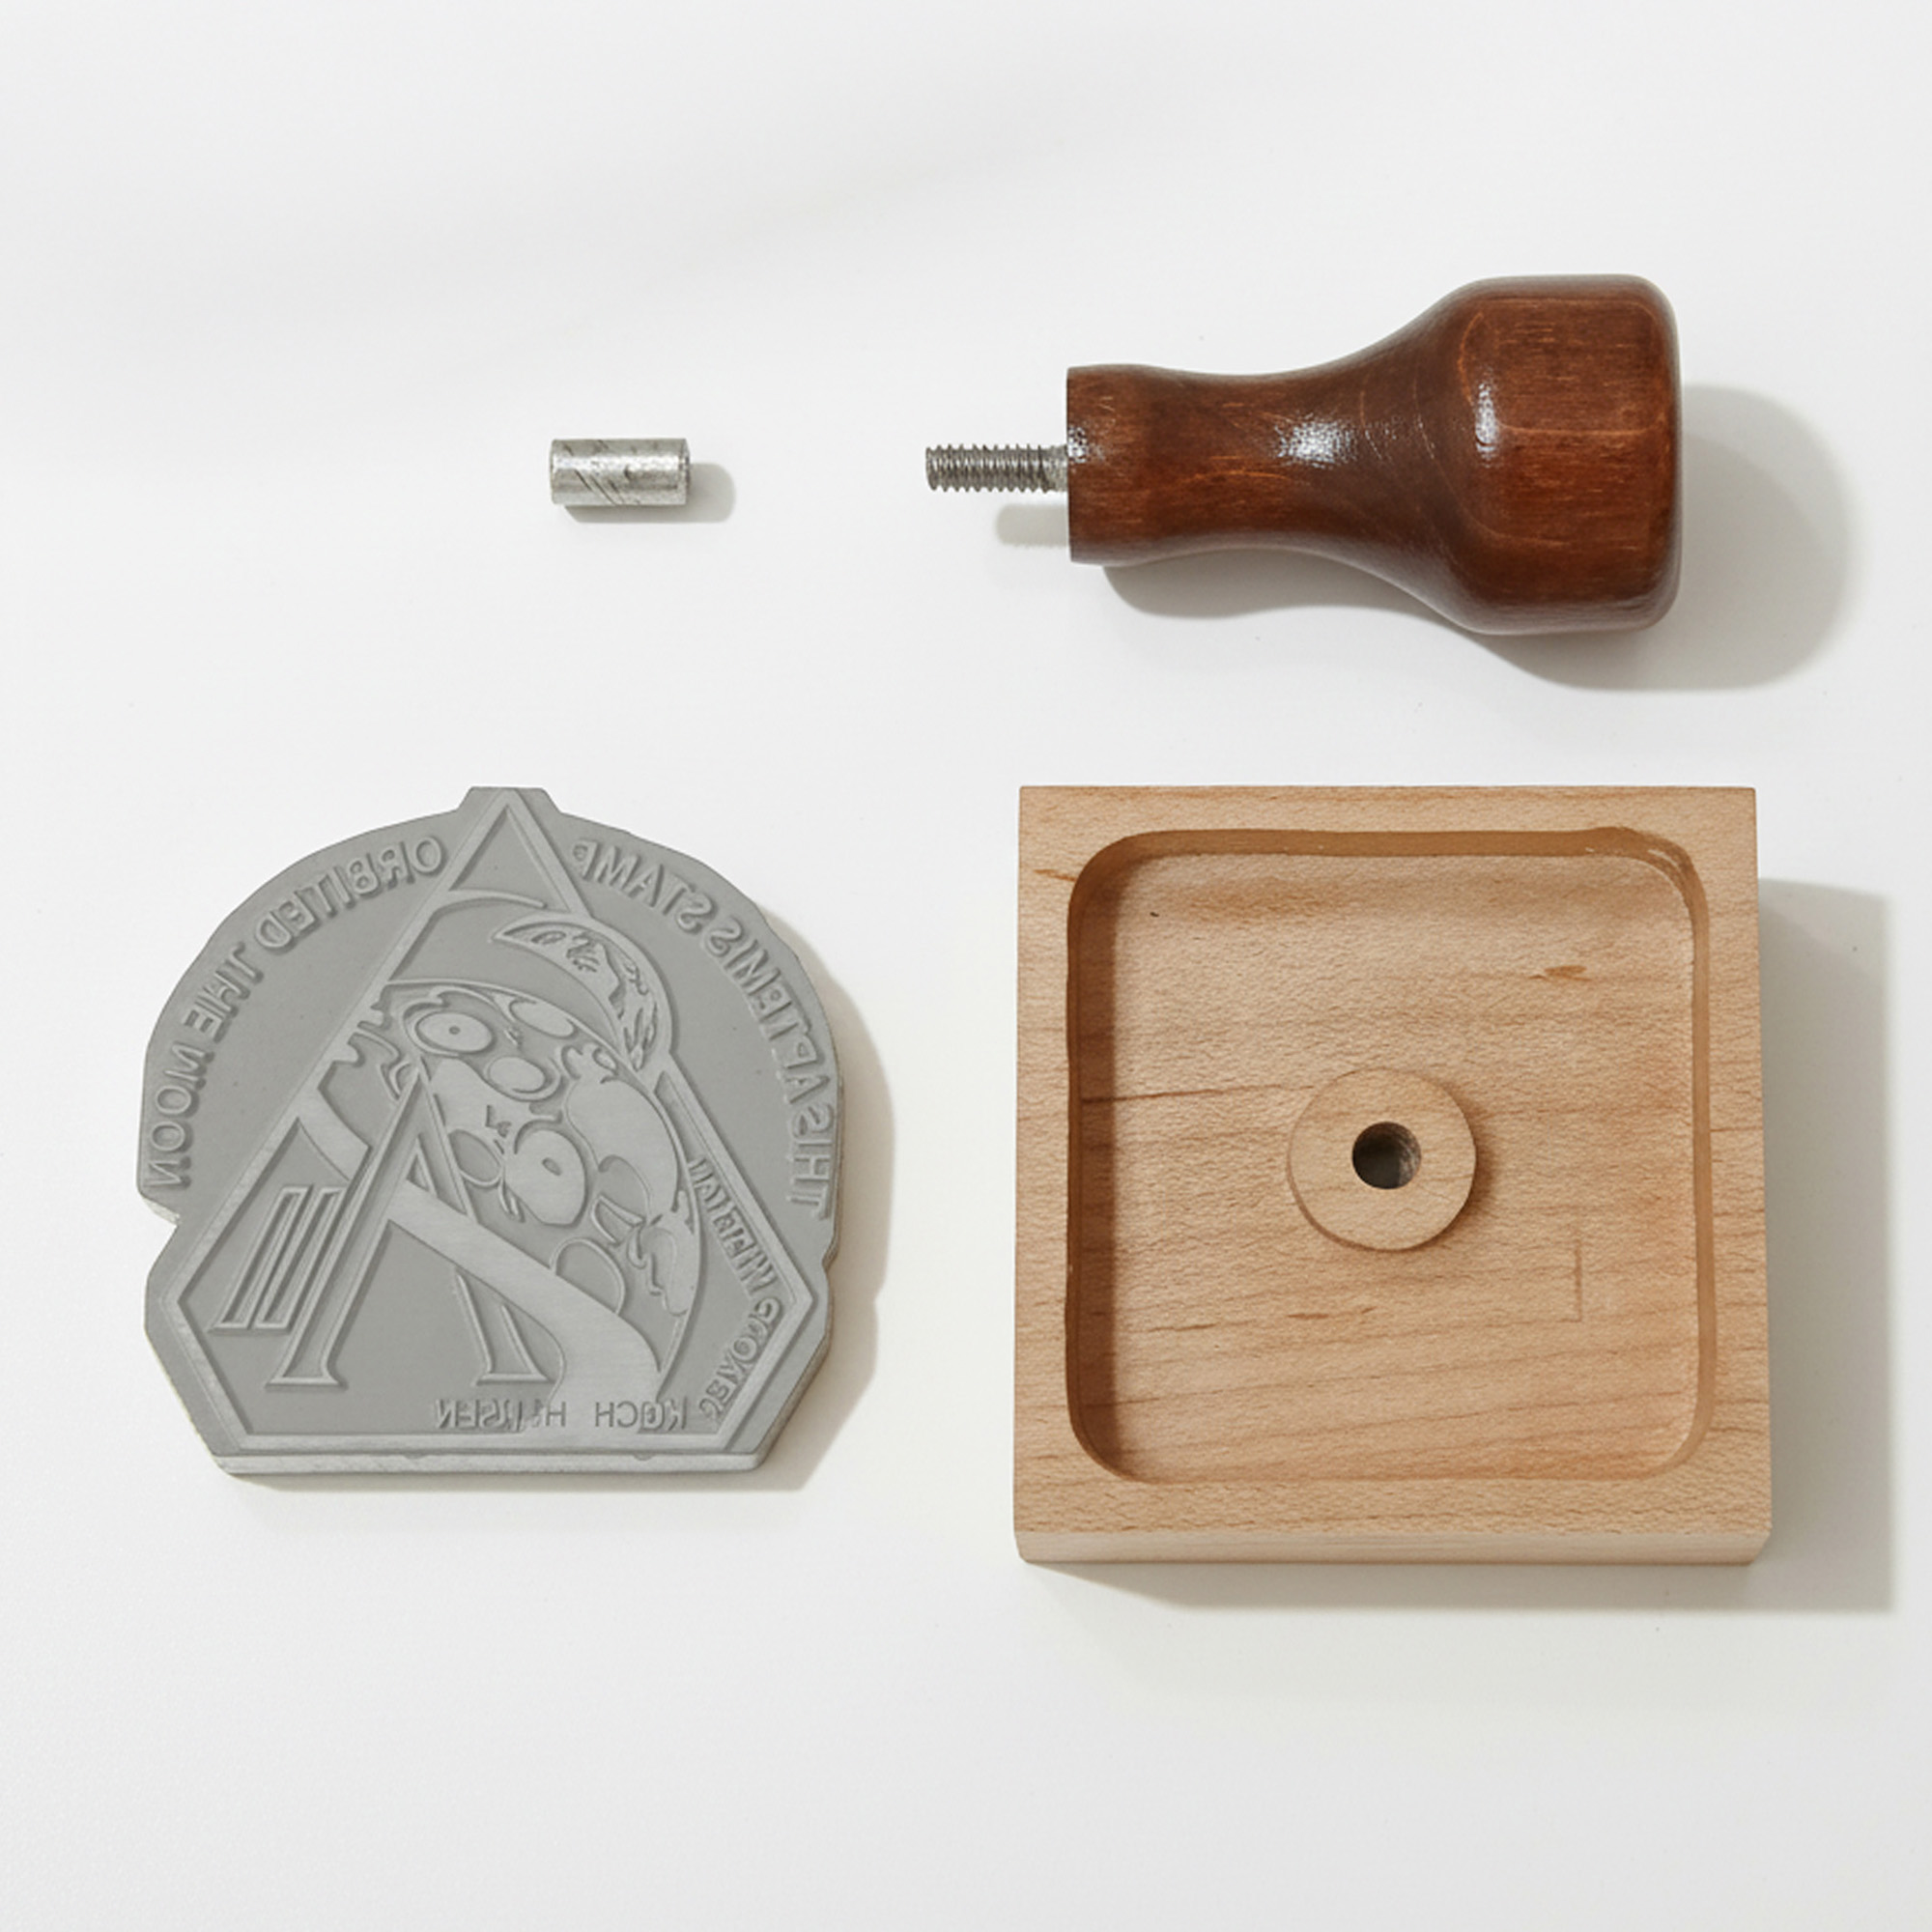
NASA did not ask for a modified version of an existing stamp. They asked for a tool engineered to meet mission requirements where weight, balance, and reliability all mattered. The complete stamp assembly needed to come in under one ounce, while still producing the same clean impression our customers expect every day.
That requirement shaped every decision.
How the Stamp Was Engineered
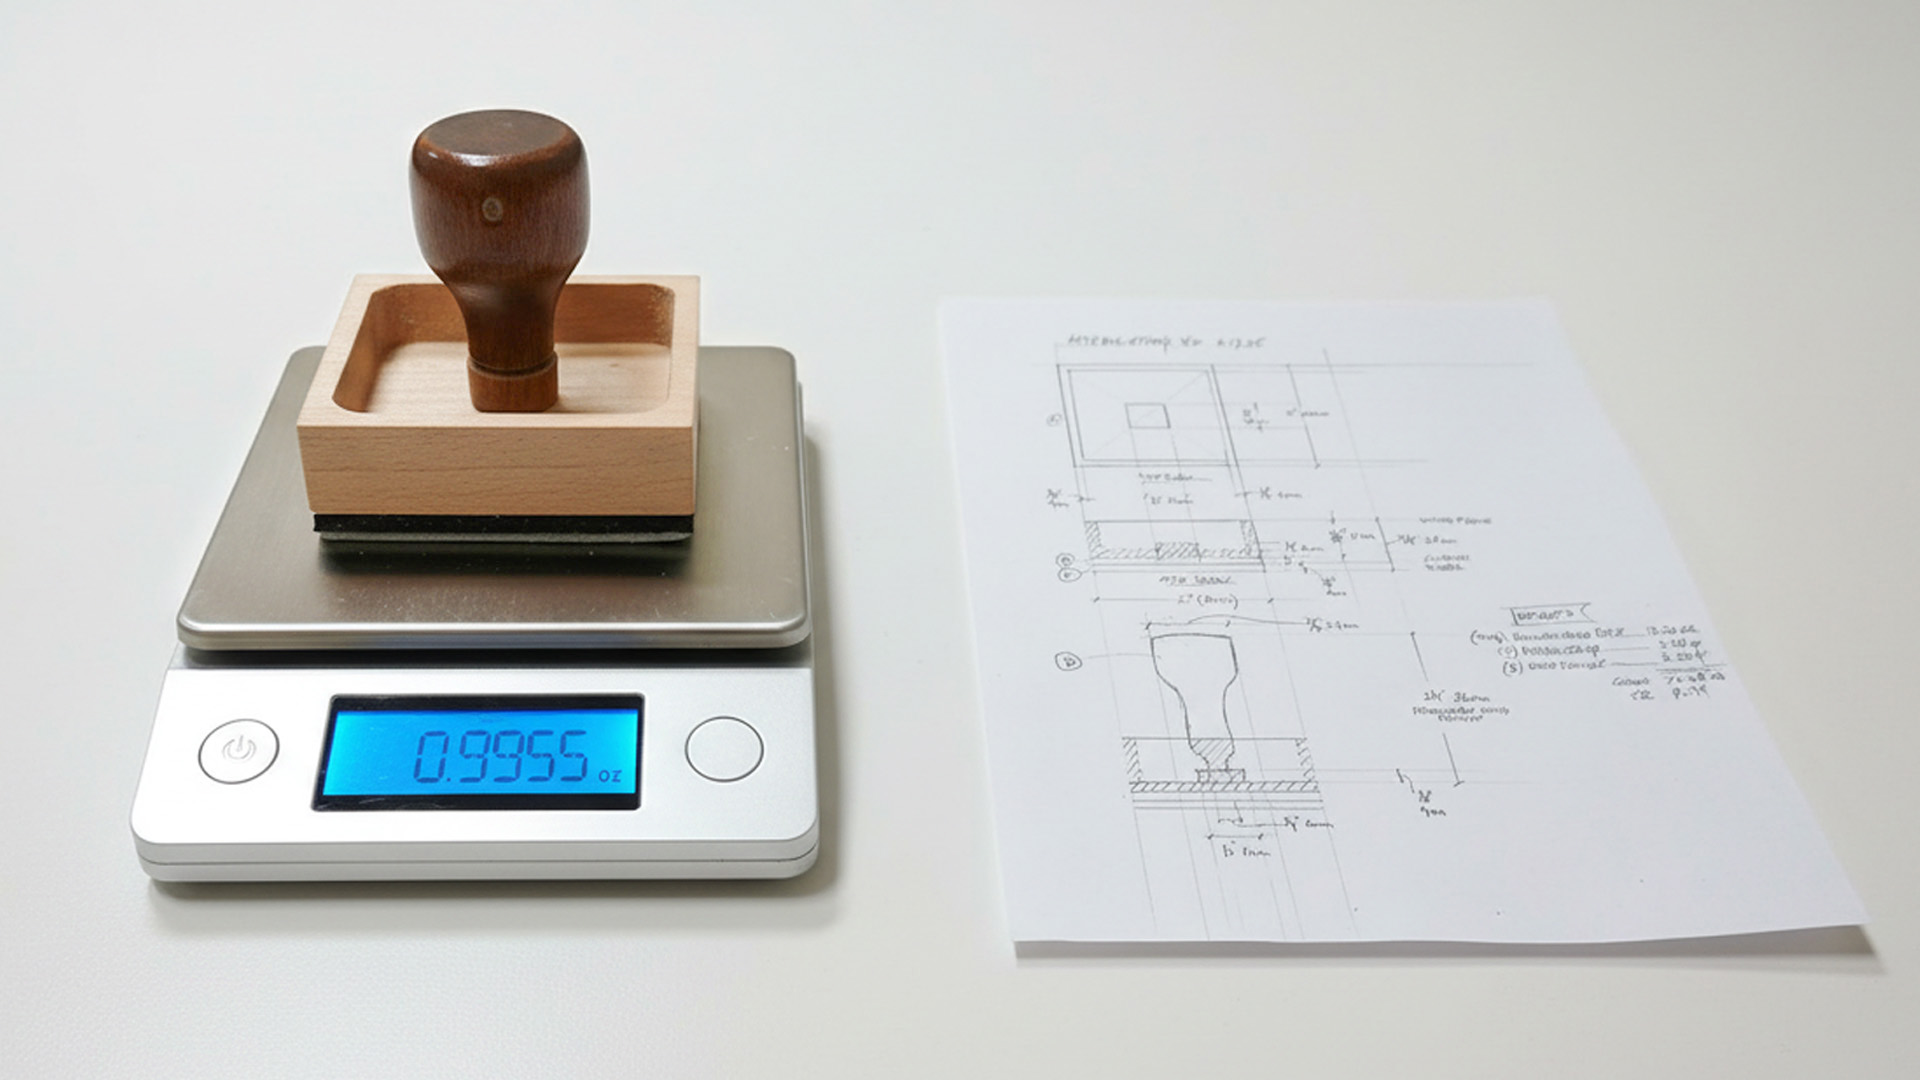
- Target Weight: Under 1 ounce
- Body Material: Hard maple, selected for strength, stability, and predictable grain structure
- Handle Construction: Hollowed to remove unnecessary mass while preserving balance and structural integrity
- Laser Engraved: Laser depths set deeper than normal to remove mass while maintaining the perfect stamp impression.
- Assembly Design: Custom detachable handle system designed and test fitted for repeatable alignment
- Validation and Testing:
- Multiple impression tests to confirm crisp, consistent results
- Durability checks to ensure the structure held up under repeated use
This work was led by Frank Ferraro, whose hands on experience ensured the stamp met both mission specifications and our internal quality standards.
Why did this level of precision matter?
If you have ever repacked a suitcase at the airport to avoid an overweight bag fee, you already understand the concept.
In spaceflight, weight is never just a number. Estimates suggest that transporting even a single ounce of material to the Moon and returning it on a crewed mission can cost hundreds of thousands of dollars. Every ounce saved reduces cost, complexity, and risk.
Decades of Craft, Applied in a New Way
Founded in 1954, Simply Stamps has spent more than seven decades creating custom stamps for businesses, government agencies, educators, and professionals who rely on accuracy and consistency every day. Most of those stamps live on desks, in classrooms, and inside offices.
This one just happened to be built for space.
That did not change how we approached it. The stamp was held to the same standards we apply to every order. The same engraving precision. The same quality checks. The same expectation that when ink meets surface, the impression is clean, dependable, and repeatable.
Space missions leave no room for inconsistency. Every component, no matter how small, must perform exactly as expected. That mindset is familiar territory for us.
Whether a tool is used once or thousands of times, trust is earned the same way. By doing the job right every time.
For the Ones Who Look Up
For those who love space, the Artemis II mission represents more than a flight path. It’s a return. A continuation of human curiosity. A reminder that exploration is built on thousands of small, precise actions done right.
This stamp is one of those actions.
It won’t land on the moon. But it will travel its orbit. Quietly doing its job.Leaving its mark as part of a mission that will be remembered for decades.
A Local Team, Watching History
When the Artemis II launch lights up the sky, our Jacksonville based team will be watching — knowing something they engineered by hand is part of that moment.
Not many makers get to see their work leave Earth.
Our Story, Pressed Into Ink

Simply Stamps was built on the belief that small tools can do important things. Those details matter. That when something is made with care, it performs with confidence.
This project didn’t change who we are.
It reinforced it.
From everyday businesses to extraordinary missions, the goal is the same. Design with purpose. Build with precision. Deliver a custom stamp that works exactly as expected.
Because whether it’s a form, a document, or a moment in history…
Your mark matters.
Simply Stamps supplied this custom stamp directly to NASA for the Artemis II mission. This project does not imply NASA endorsement of Simply Stamps or our products.


![How to Address a Business Envelope [Guide + Ideas]](https://cdn.simplystamps.com/media/magpleasure/mpblog/list_thumbnail_file/8/5/cache/5/ece9a24a761836a70934a998c163f8c8/851057e3b6dc9ad238a0bddedc4864ae.jpg)


![How to Address an Envelope to a Family [Guide + Ideas]](https://cdn.simplystamps.com/media/magpleasure/mpblog/list_thumbnail_file/1/1/cache/5/ece9a24a761836a70934a998c163f8c8/1116160e2578852804ca7ed94fe50c67.jpg)


